When your family spends all day at home, safety hazards multiply in ways most traditional checklists miss. A thorough home safety walkthrough takes about two to three hours and focuses on high-traffic wear patterns, increased appliance use, and the overlooked risks that emerge when bedrooms double as classrooms and living rooms become all-day activity centers. You’ll systematically inspect each room for electrical overload, tripping hazards from constant foot traffic, ventilation issues from closed-up spaces, and the subtle dangers that develop when every square foot of your home works harder than it was designed to handle.
For New York homeschooling families, this isn’t about creating fear. It’s about recognizing that your home now functions more like a small school building, and that shift demands a different safety lens. When children learn, play, eat, and rest in the same spaces day after day, normal household items become higher-risk. That craft supply cupboard gets opened twenty times instead of twice. Your dryer runs multiple loads daily instead of a few per week, making maintenance like dryer vent cleaning Seminole residents prioritize even more critical for preventing fire hazards.
This walkthrough gives you a room-by-room system to spot problems before they become emergencies, with specific checks tailored to constant occupancy and verification steps so you know your family is protected.
What You’ll Need for Your Safety Walkthrough
You probably have everything you need sitting in a kitchen drawer or tucked away in your toolbox. Most families conducting a home safety walkthrough can gather their supplies in under five minutes, and the total cost runs close to zero if you already own a basic smartphone and a few household items.
Here’s what to collect before you begin your room-by-room inspection:
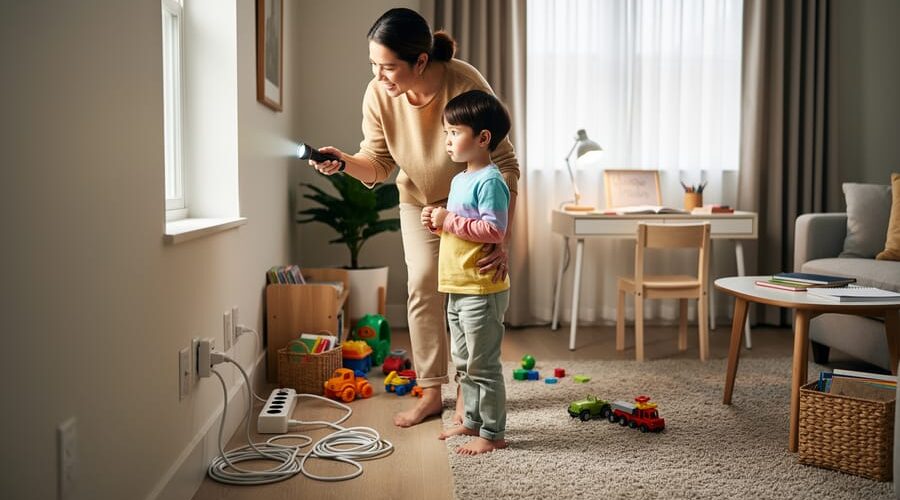
- Flashlight or headlamp for checking dark corners, behind furniture, and inside closets
- Notepad and pen to record findings, note repair needs, and track your progress through each room
- Smartphone or camera to photograph hazards, document before-and-after conditions, and share concerns with repair professionals if needed
- Smoke detector test button (built into each unit) or a can of detector test spray for verification
- Outlet tester to check electrical safety in frequently used areas where devices stay plugged in during school hours
- Measuring tape for verifying furniture stability zones, checking stairway dimensions, and ensuring proper spacing around heat sources
- Step stool to safely reach high smoke detectors and inspect upper shelves where supplies might be stored
You might already keep some of these tools with your homeschool supplies list making them even easier to grab when you’re ready to start. If you’re missing an outlet tester, they cost less than ten dollars at any hardware store and provide years of use for ongoing safety checks.
The simplicity of this supply list reflects an important truth: conducting a thorough safety walkthrough doesn’t require specialized equipment or professional training. It requires attention, time, and a willingness to look at your home with fresh eyes now that your family occupies it differently than households where everyone leaves for work and school each morning.
Critical Safety Warnings Before You Begin
Before you begin walking through your home, understand the difference between inspection and repair. Your role is to identify potential hazards, not fix complex problems yourself. Some issues require immediate professional attention, and attempting DIY solutions can put your family at greater risk.
Know when to pause and seek expert help. Electrical problems beyond loose outlet covers need a licensed electrician. Strange odors from appliances, persistent pilot light issues, or suspected gas leaks require your utility company or a certified technician. Visible foundation shifts, sagging floors, or ceiling cracks suggest structural concerns that need an engineer’s assessment before you proceed with any changes to your homeschool classroom setup or homeschool storage solutions.
Handle discovered hazards thoughtfully. If you find a damaged cord, unplug it rather than testing it further. When you notice a loose handrail, mark it clearly and avoid using those stairs until it’s secured. Document problems with photos, but don’t create new risks by moving heavy furniture or climbing unstable surfaces to investigate.
Time your walkthrough considerately. Test smoke alarms during daytime hours when the noise won’t startle sleeping family members or disrupt focused work. Schedule your inspection when you can move through the home without rushing, ideally when older children can occupy younger siblings during sections that require concentration.
Involving children teaches valuable safety awareness without creating fear. Older students can help check expiration dates or note observations while you inspect. Younger ones can participate in age-appropriate tasks like counting smoke detectors. Frame the walkthrough as a positive family activity, similar to organizing brain breaks into your school day. Explain you’re making sure everything works properly, not hunting for danger around every corner.
Step-by-Step Safety Walkthrough Process
Step 1: Check All Smoke and Carbon Monoxide Detectors
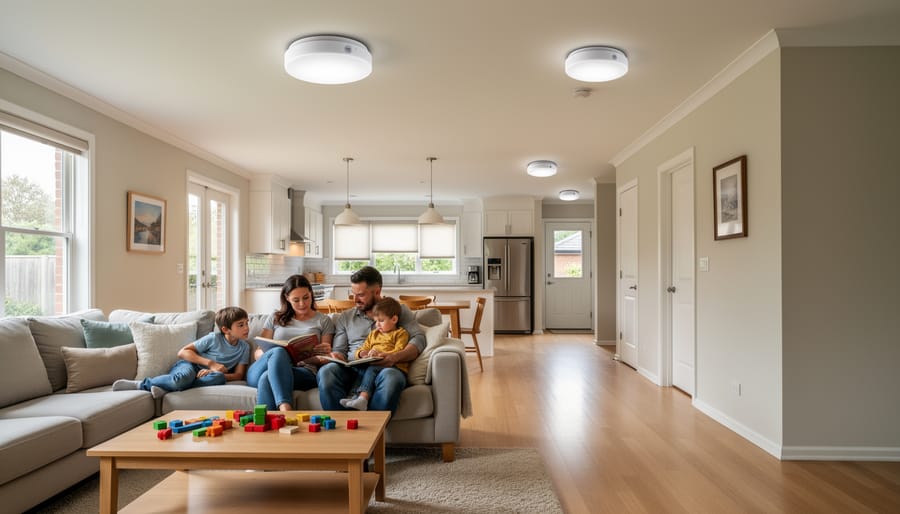
Start with your smoke and carbon monoxide detectors because they’re your first line of defense when your family is home around the clock. Press the test button on each unit and wait for the alarm, if it sounds weak or doesn’t respond, replace the batteries immediately. While you’re there, check the manufacture date stamped on the back or side of each detector. Smoke alarms expire after 10 years, and carbon monoxide detectors typically last 5 to 7 years. If they’re past their prime, add replacements to your shopping list.
Verify you have proper coverage: at least one smoke detector on every floor, inside each bedroom, and in hallways outside sleeping areas. For carbon monoxide detectors, place them near sleeping areas and on every level, especially if you have fuel-burning appliances or an attached garage.
When you’re cooking multiple meals daily, running the dryer frequently, and using heating systems for extended periods, these detectors work harder. A unit that might catch a problem during occasional evening use becomes essential when your home operates as a full-time classroom and living space. Check them now, then test monthly going forward.
Step 2: Inspect Your Learning and Activity Spaces
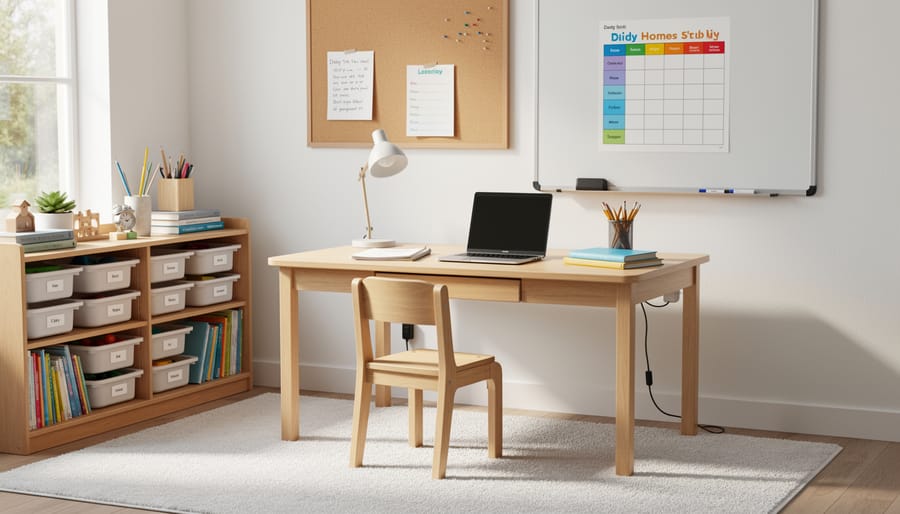
Start where your children actually spend their school hours, the dining table, a dedicated homeschool room, or that corner of the living room that’s evolved into a classroom. Because these spaces see six to eight hours of daily use, they need scrutiny beyond what a typical home inspection covers.
Check the lighting first. Stand where your child sits and look at their workspace during different times of day. Harsh glare on screens causes headaches, while dim lighting strains eyes during reading and writing. You need adjustable options, a desk lamp with a warm bulb for close work and overhead lighting that doesn’t cast shadows on their materials.
Test every bookcase and storage unit by giving it a firm shake. Units holding heavy textbooks, science supplies, or craft materials can tip if not anchored to walls. If you can rock it, your climbing toddler or leaning teenager definitely can. Secure tall units with furniture straps or L-brackets.
Trace every electrical cord from device to outlet. Computers, tablets, lamps, pencil sharpeners, and charging stations create a tangle that’s both a tripping hazard and a fire risk. Run cords along walls using cable clips, never under rugs where they overheat. Count how many devices share one outlet, if you’re using power strips daisy-chained together, you’re overloading the circuit.
Finally, open a window. Constant occupancy means the room needs fresh air circulation. Stuffy spaces breed germs and reduce focus. If windows don’t open or outside air quality is poor, ensure your HVAC system has a clean filter and runs regularly throughout school hours.
Step 3: Evaluate Kitchen Safety for All-Day Use
Your kitchen works harder than most, with constant meal prep, snacks, and cleaning throughout the day. Start at your stove: verify all burners ignite properly and oven controls are clearly marked. Check that pot handles aren’t near counter edges where they might get bumped during the morning rush or afternoon science project.
Open your knife drawer. Blades should be stored safely, consider a knife block or magnetic strip if little hands explore drawers. Next, survey cleaning supplies. The cabinet under the sink is convenient but often unlocked. Install a childproof latch if you haven’t already, especially when families are home all day and children have more opportunities to investigate.
Walk the floor during a typical busy time. Spills happen more frequently with constant use. Throw rugs near the sink can become slip hazards when wet, secure them with non-slip backing or remove them entirely. Check that floor tiles aren’t cracked or lifting.
Finally, assess snack accessibility. Can your eight-year-old reach healthy options without climbing counters or pulling chairs? Designate a low cabinet or basket for safe self-service items. This reduces climbing risks and builds independence while you’re teaching an older sibling.
Step 4: Examine Stairways, Hallways, and High-Traffic Zones
Start at your front door and walk every hallway and staircase in your home, paying attention to what you see with fresh eyes. When your family is home all day, these transition spaces see ten times the traffic they would in a traditional household. Kids walk these routes dozens of times, heading to the bathroom, grabbing snacks, moving between learning areas, which means hazards you might tolerate in an evening-only home become genuine risks.
Check that stair handrails are firmly attached at both ends and don’t wobble when you grip them hard. Run your hand along the rail to feel for splinters or sharp edges. Look for adequate lighting at the top and bottom of every staircase, especially if your family moves around during early morning or evening hours. A burned-out bulb that wouldn’t matter much when everyone’s at work becomes a problem when someone’s carrying a stack of books upstairs at 10 a.m.
Scan for tripping hazards: loose area rugs that slide underfoot, charging cords stretched across walkways, backpacks left in the middle of the floor, or piles of library books waiting to be returned. Homeschool materials have a way of migrating throughout the house, and what seems like a temporary setup can become a fixture. Make sure all rugs have non-slip pads underneath and that cords run along walls, not across pathways.
Verify that your exit paths stay clear. In an emergency, you need to reach exterior doors without navigating an obstacle course.
Step 5: Assess Bathrooms for Slip and Chemical Hazards
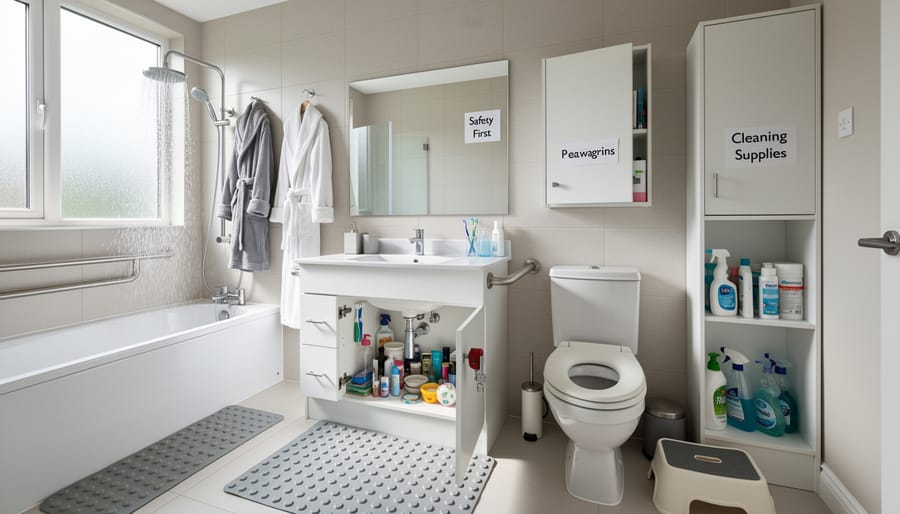
Bathrooms see constant traffic when your family is home all day, turning them into high-risk areas for slips, chemical exposure, and moisture problems. Start by testing every bath mat and shower surface. Press down firmly, if it slides or lifts easily, it needs replacing or non-slip backing. Check that shower floors aren’t slick from soap buildup, which accumulates faster with multiple daily uses.
Open medicine cabinets and under-sink storage. Medications should sit well above children’s reach, ideally in a locked box. Move cleaning products to high shelves or install childproof latches on lower cabinets. Check expiration dates while you’re there, families often discover expired medications during these reviews.
Run a hot water tap and time how long until it becomes uncomfortably hot. Water heaters set above 120°F can scald a child in seconds. Turn the bathroom fan on and leave it running for five minutes, then check if moisture or odors linger. Poor ventilation with frequent showers breeds mold quickly.
Test GFCI outlets by pressing the test button, the reset button should pop out. These outlets prevent electrical shock near water and should exist in every bathroom your family uses regularly.
Step 6: Review Outdoor and Garage Spaces
Families using outdoor spaces for learning, exercise breaks, and playtime need secure boundaries and hazard-free zones. Start at your property perimeter, walk the fence line checking for loose boards, rusty nails, or gaps large enough for children or pets to slip through. Test gate latches to confirm they close and lock automatically; kids darting outside for recess shouldn’t be able to accidentally leave gates open.
In the garage, raised storage becomes essential. Tools like saws, drills, and pruning shears must sit on high shelves or in locked cabinets, not within reach. The same goes for pesticides, fertilizers, antifreeze, and paint, toxic substances that curious learners might mistake for harmless liquids. Place homeschool supplies that overflow from indoor spaces, art materials, science equipment, sports gear, in clearly labeled bins off the floor to prevent tripping.
Test your garage door’s auto-reverse sensor by placing a rolled towel under the descending door; it should immediately reverse. Scan the yard for stumbling blocks: coiled hoses, broken pavers, uncovered window wells, or low-hanging branches along play paths. Clear sightlines from windows let you supervise outdoor activities without constant trips outside.
Step 7: Test Home Security and Emergency Systems
Test each exterior door lock by turning the deadbolt fully and checking that it engages smoothly without sticking. Try window locks on all floors, especially those at ground level or near fire escapes. If you have a security system, arm and disarm it to confirm all sensors respond correctly.
Walk through your home and locate every posted emergency contact list. Update any outdated numbers and ensure lists include your pediatrician, poison control, nearby relatives, and neighbors who could help during a crisis. Post copies near phones and in your primary homeschool space.
Open your first aid kit and check expiration dates on medications, ointments, and sterile supplies. Restock bandages, gauze, and any items you’ve used. Keep the kit in a consistent, accessible spot that older children know about.
Find each fire extinguisher and check the pressure gauge. The needle should rest in the green zone. If it’s low or the extinguisher hasn’t been inspected in a year, schedule professional servicing or replacement.
Finally, walk your family’s primary and secondary escape routes from each room. Identify your outdoor meeting spot and confirm everyone can state it clearly.
Step 8: Check Electrical Systems and Outlets
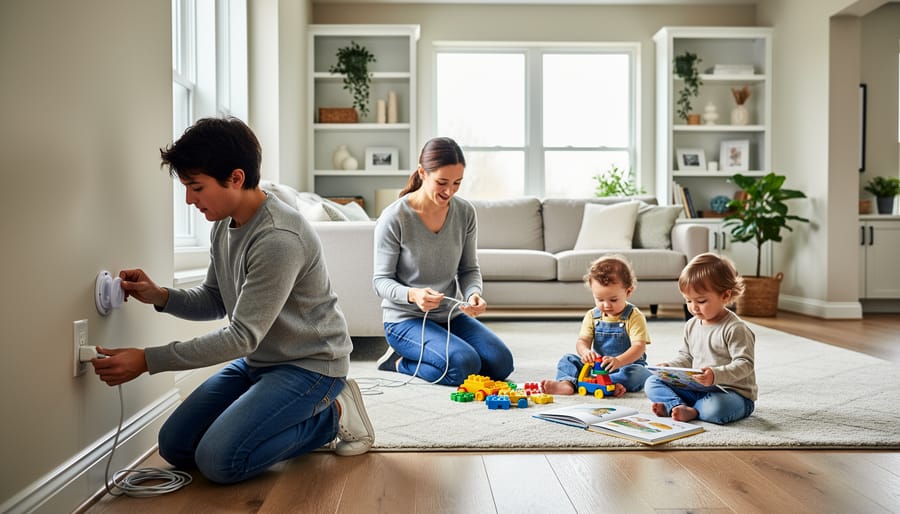
Count the devices plugged into each room where your family spends school hours. If you’re using power strips or extension cords to accommodate laptops, tablets, printers, and charging stations, you’re likely overloading circuits designed for lighter use. Check outlets for warmth, a hot outlet signals dangerous overload. Look for scorch marks on outlet covers and listen for buzzing sounds.
Test GFCI outlets in kitchens and bathrooms by pressing the test button; the reset button should pop out. These outlets prevent electrocution near water sources that get constant use when everyone’s home. Inspect all visible cords for fraying, especially where they bend near plugs. Replace damaged cords immediately rather than wrapping them with tape.
If younger children are present, confirm outlet covers are secure in unused sockets. Review your extension cord setup critically, these are temporary solutions, not permanent infrastructure for a home classroom.
How to Verify Your Home Is Safer and What to Do Next
Once you’ve completed your walkthrough, gather your notes and photos in one place. Review everything you documented, room by room, and assess which findings need immediate attention versus those you can schedule for later. This review process transforms your observations into a concrete action plan.
Start by categorizing your findings using a priority system:
- Immediate (address today): Non-functioning smoke detectors, exposed wiring, gas smells, major tripping hazards in high-traffic areas, unsecured chemicals within children’s reach, broken locks on exterior doors.
- Within one week: Overloaded outlets, missing outlet covers, loose handrails, inadequate lighting in stairways, expired fire extinguishers, water leaks.
- Within one month: Cluttered emergency exits, furniture that needs anchoring, worn carpet on stairs, missing GFCI outlets in bathrooms, outdated emergency contact lists.
- Ongoing maintenance: Seasonal detector testing, quarterly walkthrough reviews, regular decluttering of learning spaces, updating first aid supplies.
Create a simple spreadsheet or notebook where you track each issue, its priority level, estimated cost, whether you’ll DIY or hire a professional, and completion date. This documentation becomes your home safety record and helps you stay accountable.
Involve your children in age-appropriate ways. Explain what you found and why certain changes matter. When you install a new smoke detector or secure a bookcase, show them how it works and why it keeps everyone safer. This naturally integrates safety awareness into your homeschool curriculum and builds responsibility. You might even incorporate these lessons into your first-day routines each school year, reviewing safety protocols as a family.
Establish a regular review schedule. Mark your calendar for quarterly quick checks and a full annual walkthrough. Seasonal changes bring different safety considerations, space heaters in winter, window safety in summer, so timing reviews with the seasons makes practical sense. Each walkthrough becomes faster as you develop a routine and maintain improvements rather than discovering accumulated problems.
Common Questions About Home Safety for All-Day Families
How often should families who are home all day conduct a full safety walkthrough?
Plan a comprehensive walkthrough every three months, since constant home use accelerates wear on fixtures, furniture, and systems. Between full inspections, do quick monthly spot-checks of high-traffic areas, smoke detectors, and any previously identified concerns.
Should I involve my children in the safety walkthrough process?
Yes, involving age-appropriate children turns the walkthrough into a practical life skills lesson and helps them develop awareness of their environment. Older children can help test smoke detectors and check for tripping hazards, while younger ones can participate in simpler tasks like ensuring nightlights work. Just present it as problem-solving rather than creating fear about dangers.
How do I balance creating a comfortable learning environment with maintaining safety standards?
Safety and comfort aren’t opposites. Secure heavy furniture to walls but arrange it to create cozy reading nooks. Use cord management solutions that keep cables organized and accessible but not dangling. The goal is removing actual hazards without making your home feel sterile or institutional.
What special considerations apply when you have children of very different ages at home together?
Multi-age families need layered safety approaches. What’s safe for a teenager can be dangerous for a toddler, so install locks on cabinets containing supplies the older kids need regular access to, create designated zones where younger children play under supervision, and teach older siblings to put away materials that pose risks to little ones.
How should safety measures change as children mature?
Reassess your setup annually as kids gain skills and independence. Remove outlet covers when children understand electrical safety, adjust furniture accessibility as they grow taller, and gradually involve them in maintaining safety systems like checking batteries or testing locks. What protected a five-year-old may frustrate a capable twelve-year-old unnecessarily.
Do I need professional help, or can families handle safety walkthroughs themselves?
Most walkthrough tasks are simple observations any parent can manage. However, call professionals immediately for electrical problems, gas odors, structural issues like sagging floors, or anything involving your heating and cooling systems. Your walkthrough identifies what needs expert attention rather than replacing professional assessment.
One question families often overlook is whether their insurance coverage reflects their home’s dual role as residence and educational space. While this doesn’t affect the physical walkthrough, it’s worth verifying that your policy adequately covers the increased occupancy and activity level. Some insurers offer specific provisions for homeschooling families.
Don’t treat these walkthroughs as pass-fail exercises. Every home has imperfections, and discovering issues means you’re being thorough, not that you’ve failed. The families who find the most hazards are often the ones looking most carefully, which is exactly the mindset that keeps everyone safer. Document what you find, address urgent items promptly, and schedule the rest according to priority and budget. Even incremental improvements make a real difference when your family spends 12 to 16 hours a day in these spaces.
Completing your home safety walkthrough brings more than just identified hazards and repair lists. It delivers genuine peace of mind knowing your family can learn, work, and live in spaces you’ve personally verified as safe. That confidence matters when your home isn’t just where you sleep, but where children spend their entire day exploring, creating, and growing.
Think of this walkthrough as the beginning of an ongoing practice, not a one-time project. Families who occupy their homes all day naturally wear down systems faster and introduce new patterns that create fresh hazards. A seasonal review keeps you ahead of problems before they escalate.
Your homeschool setting offers a unique advantage here. Unlike families who scatter to schools and offices each morning, you’re present to notice changes immediately and address them promptly. You’re also modeling something invaluable for your children: the habit of noticing risks, taking responsibility for your environment, and maintaining the spaces you inhabit. These lessons in safety awareness and proactive care extend far beyond your home’s walls.
A safer home directly supports better learning and richer family life. When you’ve eliminated distractions like flickering lights, tripping hazards, and nagging worries about unsecured chemicals, everyone can focus on what truly matters.